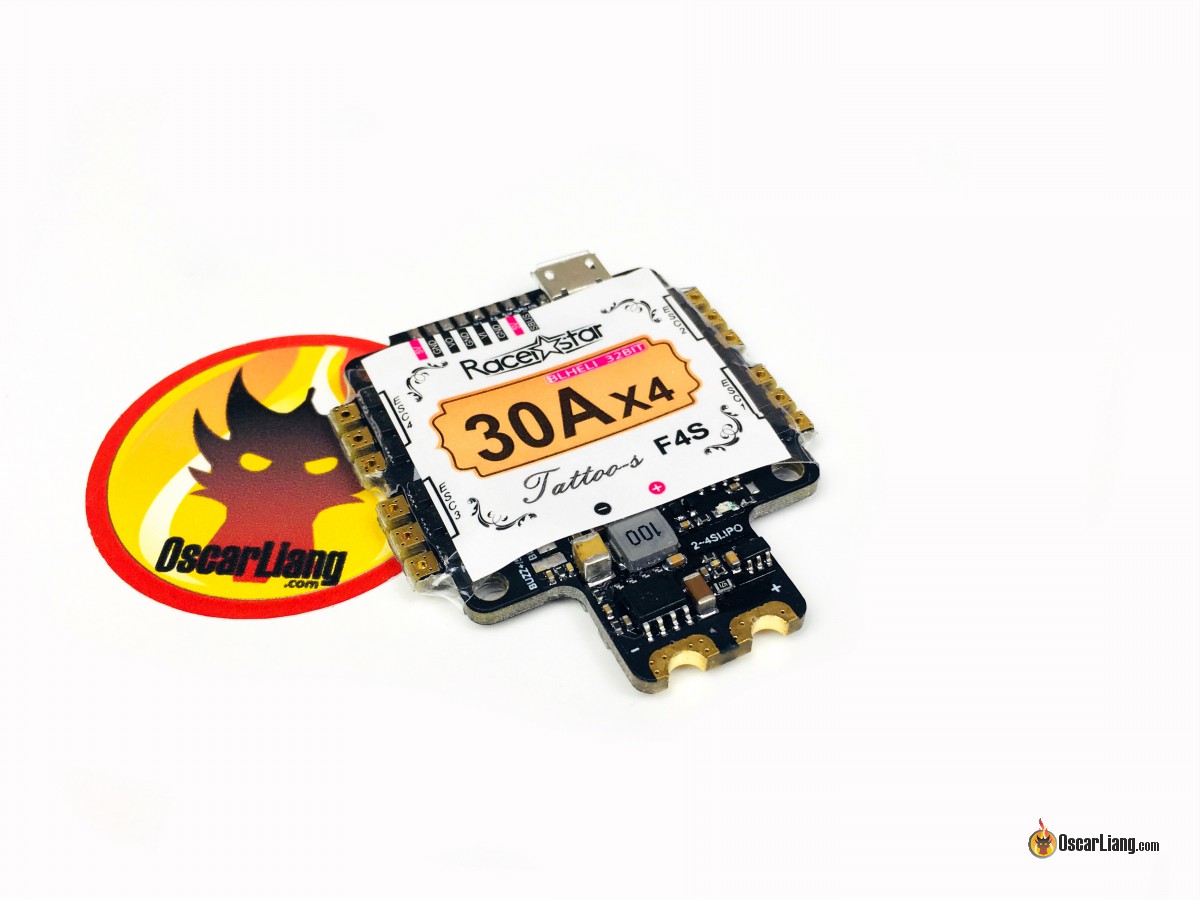
The TattooF4S from Racerstar is an AIO FC that not only has integrated PDB, but also combines ESC’s on one single board! I am very excited about the idea because it can truly clean up the wiring and make your mini quad much easier to build.
Buy the Racerstar TattooF4S from: Banggood | Amazon. Same rebranded board: Lumenier Alpha AIO and Sunrise Siskin.
Further Reading:
The biggest selling point of the TattooF4S is the integrated BLHeli_32 ESC’s, and the whole board only weighs 16.5g! This makes it a great option for ultralight weight builds, as well as those require easy and clean wiring.
It’s also relatively cheaper than getting an F4 FC and a 4in1 BLHeli_32 ESC separately, which can cost about $30+ and $50+ respectively. The TattoF4S is only priced at $75.
Lastly, the whole FC is conformal coated which reduces the chance of short circuit (the solder pads are not coated).
Specification
- F4 Processor, MPU6000 Gyro
- Input Voltage: 2S-4S
- Supports Betaflight OSD
- Built-in current sensor
- 16MB flash memory for blackbox
- BEC: 5V/2A
- Current rating of each ESC channel: continuous 30A, burst 35A
- Running BLHeli_32 firmware, supports DShot1200
- Weight: 16.5g
- Dimension: 41.5mm x 50mm x 6mm
The spec looks sweet with a list of up-to-date features, and I really dig the idea of integrated ESC. We will find out if the ESC’s are low noise and can hold up to abuse, if they are this would probably be my next go to setup.
In the package, the TattooF4S FC comes with
- 2x 16AWG wires (9cm long)
- 5x M3 22mm Nylon screws
- 9x M3 5mm standoffs
- 5x M3 3mm standoffs
- 5x M3 Nylon nuts
I am a little bit disappointed that it doesn’t come with rubber bobbins for soft-mounting, XT60 connector and a low ESR capacitor, though you can get them cheaply everywhere.
Further Reading:
The TattooF4S is in a similar form factor to a normal flight controller with 30.5×30.5mm mounting holes. I am amazed by how many features are packed in this board, it has all the things that I normally use on an AIO FC, plus the four integrated ESC’s.
Not only it will save space, it also makes building a lot easier and cleaner because there is no soldering or wiring at all. Simply connect your motors to the FC and you are done.
However, due to the compact size, there isn’t a lot of space left on the board for solder pads, some useful pads are simply left out, for example UART3, which is available in the configurator but no where to be found on the board.
As you can probably see in the close up photos, there is conformal coating on the board. I like the fact that all the solder pads are located on the top side of the FC, and nothing on the bottom, this makes soldering a lot easier.
Here is how I wire up the TattooF4S FC with motors, VTX, FPV Camera, Frsky RX, buzzer and capacitor.
The dedicated SBUS port is inverted so you can’t really use it for anything else apart SBUS. You are really just left with one uninverted UART on the board, UART6 (TX6, RX6).
Since SmartPort Telemetry is also inverted, you cannot connect Smart Port directly to TX6, you need to get the uninverted signal on the RX. Therefore I prefer to connect the inverted SmartPort to the LED pin and enable Soft Serial for it, in that case I don’t need to worry about inversion.
To use SmartAudio, you can use then UART 6.
For people running iBUS, Crossfire, as well as Spektrum, you will have to use UART6 (note that there is already a 3V output for Spektrum Satellite receivers). In this case, in order to use SmartAudio you will need to use Soft Serial and the LED pin.
I recommend soft mounting the FC using rubber bobbins (Buy: | Amazon | GetFPV), this will help reduce the amount of vibration getting to the Gyro on the FC.
You are meant to mount this FC following the arrow symbol on the board, but then the USB connector would be facing forward and become inaccessible as hidden inside the frame.
It would probably make more sense to mount it side way. But it really doesn’t matter what orientation you install the FC, you probably only need to plug the FC into the computer for setup the first time and then you can use Betaflight OSD or LUA script for tuning anyway.
You can also use Resource remapping to swap the motor output around if required.
I like this FC, but it’s definitely not perfect.
ESC Telemetry is not available on this board despite having BLHeli_32 ESC’s.
It comes with Betaflight firmware 3.1.7, an old firmware that was released back in Apr 2017, and the firmware target is DHF4. However I couldn’t find this target in any newer BF version, I also tried to google it and it didn’t come back with any result.
After some research, it turns out this board uses the LUXF4OSD targetn, and it’s possibly the same board as the Lumenier F4 Alpha AIO. In the end I successfully flashed this board to Betaflight V3.3.
I am installing this FC on my quad as we speak, I will test it soon and update you guys if it works as expected.


